Showing posts with label Asian. Show all posts

Wednesday, November 16, 2011

Chard and Tofu Wontons in Sambal Soy Sauce


Be prepared for some time in the kitchen to make these wontons. It doesn't take too long, but you do have to hand fold about 30 wontons which does take a bit of time. I just cranked up the music and sipped some wine while putting these together and it was kind of meditative. And yum did they taste good! Way better than frozen wontons you can buy at the store. But if you do use wontons from the store, this sambal soy sauce recipe is delicious so try and make that on your own.

I did have one issue though when I made the wontons ahead of time and froze them. They stuck together because I let them sit on top of each other in the freezer bag, so definitely free them on a parchment-lined baking sheet before transferring them to the freezer bag. Cooking them practically tore them apart when I cooked them in a big lump.

The recipe calls for "baked soy-seasoned tofu" which I could not find anywhere. I used a recipe for Basic Baked Tofu from Isa Chandra Moskowitz's "Appetite for Reduction"which is my favorite vegan cookbook. Cut pressed tofu into 8 equal pieces and marinade in ¾ cup vegetable broth, 3 Tbsp. balsamic vinegar, 2 Tbsp. tamari or soy sauce, 1 tsp. dried thyme and 3 cloves of minced garlic. Bake at 375 for 20 minutes, spoon on some marinade and bake for another 10.

Chard and Tofu Wontons in Sambal Soy Sauce
Serves 10

Wontons
2 tsp. roasted sesame oil
1 medium carrott, finely chopped (½ cup)
4 cups chopped Swiss chard leaves
6 oz. baked soy-seasoned tofu, chopped
1 Tbsp. low-sodium soy sauce
⅛ tsp. ground white pepper
1 12-oz. pkg. wonton wrappers
3 green onions, chopped, for garnish
¼ cup chopped cilantro, for garnish

Sambal Soy Sauce
6 Tbs. Chinese malt vinegar or 2 Tbsp. balsamic vinegar plus 1 Tbsp. rice vinegar
6 Tbsp. low-sodium soy sauce
2 Tbsp. sambal oelek
4 tsp. maple syrup
2 cloves garlic, minced (2 tsp.)

To make Wontons: Heat oil in skillet over medium-high heat. Add carrot, and stir-fry 3 minutes. Add chard, and cook 5 minutes, or until wilted. Transfer mixture to food processor, and pulse until finely chopped. Add tofu, and pulse until combined. Transfer to bowl, and stir in soy sauce and white pepper.

Set 1 wonton wrapper on work surface. Spoon 1 tsp. tofu mixture in center of wrapper. Brush wrapper edges with water, and fold wrapper into triangle around filling. Press edges to seal, and place on lightly floured baking sheet. Repeat with remaining wrappers and filling.

Bring large pot of water to boil. Cook 10 Wontons at a time in boiling water 90 seconds. Remove from pot with slotted spoon, and place in bowl.

To make Sambal Soy Sauce: whisk all ingredients together in small bowl. Top Wontons with Sambal Soy Sauce, and garnish with green onions and cilantro.

Per serving (5 wontons plus 1½ Tbsp. sauce): 168 cal; 8 g prot; 3 g total fat (<1 g sat fat); 26 g carb; 3 mg chol; 736 mg sod; 2 g fiber; 3 g sugars

Love is all around you... Enjoy!

- Rachel

Twitter: @RachelRubin
Connect with me on Facebook
Visit me on Google+
Network on LinkedIn
Watch me (or my pets) on YouTube
Eat with me on Yelp


Tuesday, March 23, 2010

Yangshuo Style Eggplant


I saw Ruth Reichl making this on Gourmet's Adventure's with Ruth recently and it looked so good I went straight out to the store to get me some eggplant! I experimented with Asian food quite a bit a few years ago and I still find it one of the most intriguing types of food to make. Partly because of the interesting and unfamiliar ingredients, but also because of the interesting cuts of the vegetables and how fast everything seems to cook. It's like 90% preparation and 10% cooking and I just find that neat.

You can find the recipe for Yangshuo Style Eggplant here.

It says it serves four as a side dish, but that's a really tiny side dish. I doubled the recipe for the four of us to enjoy as a side. I wish I quadrupled it. We couldn't get enough of it!


Thursday, March 4, 2010

Brothy Chinese Noodles


Brothy. Chinese. Noodles. Three yummy words - especially when they are all together. I think this recipe was highlighted as of the "must make" recipes in the January / February 2010 issue of Eating Well magazine, so of course I complied.

I wasn't clear, and am still not clear, about what "dried Chinese noodles" really are. After going back and forth between a few different options, I picked up something called Pancit Canton (wheat noodles) which are some yellow Filipino noodles that came in a 16 oz. package and used half of it. It came out great so it's quite convenient that I have this other half already because I plan to make this again soon.

The spicy sesame oil was a bit hard to find as well. I ended up getting a tiny bottle at Whole Foods that cost about $10. But that's okay because it's a really nice flavor and I'm sure I'll use a splash with other things that I want to add a little heat too. And because of this oil this dish does come out a bit on the spicy side, which I love but might be a little hot for those adverse to spicy food.

Brothy Chinese Noodles
Serves 6

2 tablespoons hot sesame oil (see Note), divided
1 pound 93%-lean ground turkey
1 bunch scallions, sliced, divided
2 cloves garlic, minced
1 tablespoon minced fresh ginger
4 cups reduced-sodium chicken broth
3/4 cup water
3 cups thinly sliced bok choy
8 ounces dried Chinese noodles (see Note)
3 tablespoons reduced-sodium soy sauce
1 tablespoon rice vinegar
1 small cucumber, sliced into matchsticks, for garnish

Heat 1 tablespoon oil in a large saucepan over medium heat. Add ground turkey, all but 2 tablespoons of the scallions, garlic and ginger and cook, stirring and breaking up the turkey, until no longer pink, about 5 minutes. Transfer to a plate.

Add broth, water, bok choy, noodles, soy sauce, vinegar and the remaining 1 tablespoon oil to the pan. Bring to a boil over medium-high. Cook, stirring occasionally, until the noodles are tender, 3 to 5 minutes. Return the turkey mixture to the pan and stir to combine. Serve garnished with the reserved 2 tablespoons scallions and cucumber (if using).


Wednesday, February 11, 2009

Thai Chicken Soup with Chinese Black Rice


I wanted to try something made with "Forbidden Black Rice" because I thought it would be fun to play with a new ingredient. The rice is short and sturdy. You have to rinse it a few times and as you do the water gets somewhat reddish. I did not notice any distinct taste in the rice, but it does seem more filling than regular rice and is not powdery at all. I found a good Chinese black rice by Lotus Foods called "Forbidden Black Rice" at Whole Foods.

I really like most Thai soups so I am somewhat easy to please, but I was not expecting such complex flavors in something I made by myself! Really, this recipe yields restaurant-quality tastes. I took my time making this recipe on a Sunday afternoon (cook chicken, cool chicken, shred chicken, etc.) and while it did take me a while, it is actually quite a simple recipe. The only difficulty is chopping the veggies. The soup is quite healthy and if you want to trim some fat you can use a lowfat coconut milk instead of regular. I hope you try to make this impressive this soup yourself.

Thai Chicken Soup with Chinese Black Rice
Serves 4

2 cups reduced-sodium chicken broth

1 can (15 ounces) unsweetened coconut milk

2 to 3 teaspoons. Thai red or yellow curry paste

1 can (15 ounces) diced tomatoes, including liquid

1½ pound bone-in, skinned chicken thighs or split breasts

4 scallions, thinly sliced (keep white and green parts separate)

¼ cup finely diced red bell pepper

1½ cups cooked Chinese black rice

¼ cup chopped fresh cilantro or basil

2 to 3 tablespoons freshly squeezed lime juice

Thai fish sauce or soy sauce (optional)

Lime wedges, to serve at table

In a 4-quart pot, blend the chicken broth, coconut milk. and curry paste to taste. Set the pot over medium heat. Add the tomatoes, chicken, scallion whites, and bell pepper. Bring to a simmer. Cover and simmer until the chicken is cooked, 20 to 30 minutes, depending upon size.

Remove the chicken. When it is cool enough to handle, shred or chop the meat and discard the bones. Return the chicken to the pot and stir in the rice. Add the cilantro, scallion greens, lime juice to taste, and fish sauce, if needed to perk up the flavors.

Before ladling out each portion, stir well to bring the rice up from the bottom. Serve with lime wedges.


Tuesday, February 10, 2009

Spicy Tofu Lettuce Wraps


Just like the lettuce wraps from P.F. Changs's! Well, the vegetarian version anyways. I love the idea of using lettuce as a wrapper or taco shell so I was excited when I saw this recipe in the January, 2009 issue of Vegetarian Times. And this is a great recipe to introduce people to tofu, either by preparing it or just eating it. All the other flavors are very well and since it is crumbled the consistency is like scrambled eggs and works perfectly was the filling for a wrap.

Definitely take the time to prepare the garnishes because they really make these unique. Especially the flavor of the mint and the crunchiness of the peanuts.

Spicy Tofu Lettuce Wraps
Makes 16 wraps

Filling
2 tsp. vegetable oil
1 medium onion, chopped (1½ cups)
1 Tbsp. minced fresh ginger
1 Tbsp. minced lemongrass
2 cloves garlic, minced (2 tsp.)
1 lb. extra-firm tofu, crumbled
1 8-oz. can water chestnuts, drained and chopped
4 Tbsp. low-sodium soy sauce
4 Tbsp. hoisin sauce
1 to 2 tsp. vegetarian chile sauce, such as vegetarian sriracha
16 butter lettuce or iceberg lettuce leaves

Garnishes
1 large carrot, peeled and grated
½ cup chopped green onions
½ chopped fresh mint
½ finely chopped peanuts
Hoisin and chile sauces

To make Filling: Heat oil in large skillet over medium heat. Add onion, ginger, lemongrass, and garlic, and cook 7 to 10 minutes, or until onions are soft and beginning to brown. Add tofu and water chestnuts, breaking tofu into small crumbles; cook 4 minutes, or until heated through. Stir in soy sauce, hoisin sauce, and chile sauce. Transfer to serving bowl.

Place lettuce leaves on platter and set out garnishes in small serving bowls. Let guests wrap tofu mixture in lettuce leaves, and top with their choice of garnishes.


Tuesday, December 2, 2008

Shrimp and Noodle Salad with Ginger Dressing


My favorite thing about this recipe for Shrimp and Noodle Salad with Ginger Dressing is that is uses pre-cooked shrimp. There a SO MANY times I have leftover shrimp OR I buy the wrong bag of frozen shrimp and accidentally pick up pre-cooked... in addition to that, this recipe also uses other "pre-made" items like packaged coleslaw mix and store bought teriyaki sauce which makes it super easy.

I know it is December, and this recipe was taken from the May, 2008 issue of Food and Wine Magazine, but this noodle salad is so yummy that you can eat it anytime during the year. It's served room temperature, which is "cold" to some people so I can imagine it being nice during the summer. That and the original article I found it in was for "picnic salads" so known as a good dish to prepare ahead of time and travel well. However, we had it for a light dinner (in December) and enjoyed it thoroughly. I even have leftovers for work tomorrow.

The only downside to this recipe is that slicing shrimp "lengthwise" isn't as easy as you would think.

Shrimp and Noodle Salad with Ginger Dressing
4 to 6 servings

7 ounces dried udon noodles or fettuccine (fettuccine broken in half)
12 ounces shredded coleslaw mix
2 scallions, white and green parts, thinly sliced
1 cup cilantro leaves
3/4 pound cooked medium shrimp, halved lengthwise
1/4 cup teriyaki sauce
2 tablespoons finely grated fresh ginger
1/2 teaspoon Chinese chile-garlic sauce
1/4 cup plus 2 tablespoons vegetable oil
Salt
Lime wedges, for serving

Bring a medium saucepan of salted water to a boil. Add the noodles and cook until al dente. Drain and rinse under cold running water. pat dry and transfer to a large bowl. Add the coleslaw mix, scallions, cilantro and shrimp.

In a blender, combine the teriyaki sauce with the ginger and chile-garlic sauce and puree until smooth. With the machine on, slowly add the vegetable oil in a thin stream and puree until the dressing is emulsified. Season lightly with salt. Add the dressing to the bowl with the udon n oodles and toss well. Serve the noodle salad with lime wedges on the side.

Friday, July 11, 2008

Peruvian-Style Fried Rice


Jaden of Steamy Kitchen recently posted Meat Fried Rice - Four Ways which really got me thinking about how versatile fried rice can be. When I saw this recipe for Peruvian-Style Fried Rice in the May, 2008 issue of Every Day with Rachael Ray Magazine I knew I wanted to give it a try. Anything with shrimp and chorizo sounds good to me. This recipe takes a traditional Chinese dish and gives it a Latin spin.

One warning I have for you if you make this recipe is that a large skillet is simply not large enough. I used a large skillet and it was filled up with the onion, shrimp and chorizo. There was no room for the rice! I ended up using a large dutch oven and that worked out really well.

This recipe yields a HUGE quantity - I have enough for about 6 meals for myself here. The nice thing is that it reheats really well. But one can only eat so much of the same thing! The doggies are loving the fact that I have so much left over because they get it (it's not spicy, just a bit rich, but so far so good).
Peruvian-Style Fried Rice
Serves 6

Cooking spray
2 large eggs, beaten
3 Tbsp. toasted sesame oil
1 lb. medium shrimp, peeled and deveined
2 cups chopped chorizo (about 8 oz.)
1 onion, cut into 1/2-inch pieces
4 cups cooked white rice, cooled
1/4 cup soy sauce
2 Tbsp. sherry
Chopped cilantro, for garnish

Heat a medium nonstick skillet over high heat and coat with cooking spray. Pour half of the eggs into the pan, swirling to coat the bottom, and let cook until set, about 1 minute. Remove the skillet from the heat, flip the eggs and cook for 1 minute more. Transfer the egg "tortilla" to a cutting board and repeat the process with the cooking spray and the remaining egg. Roll up each egg "tortilla" and slice crosswise into 1/4-inch-thick strips.

In a large skillet, heat the sesame oil over high heat. Add the shrimp, chorizo and onion and cook, stirring, until the shrimp is just opaque, 1 to 2 minutes. Mix in the rice, soy sauce and sherry. Cook until heated through. Stir in the egg strips and top with cilantro.


Monday, June 23, 2008

Grilled Salmon with Cellophane Noodles


My first attempt and cooking fish on the grill didn't turn out so well. The recipe is great and the fish ended up tasting very flavorful, but I didn't realize how flaky the fish would become and it fell apart on the grill. Note to self: do not put fish directly on the grates, use something in between which will be easier to pick up the fish from.

Besides the fact that my fish came off the grill in large chunks, this dinner is great for a weeknight. You get all the flavor and presentation as if you have been preparing a complicated meal, but it all comes together in less than a half an hour.

The noodles on their own are pretty boring. But they add a wonderful texture and it changes up the honey-soy salmon that you may have tasted before.

Honey-Soy Lacquered Salmon with Cilantro Noodles
Serves 4

3 packages (2 ounces each) bean thread noodles

4 center-cut salmon fillets (about 6 ounces each), skin on and scaled, pin bones removed

Extra-virgin olive oil

Kosher or sea salt

1/2 teaspoon freshly ground pepper, plus more for sprinkling

5 tablespoons soy sauce

3 tablespoons honey

3 tablespoons Asian sesame oil

2 teaspoons fresh lemon juice

1/2 cup packed fresh cilantro leaves, coarsely chopped

2 tablespoons black sesame seeds

Prepare a medium-hot fire in a charcoal grill or preheat a gas grill on medium-high.

In a large bowl, soak the noodles in hot water to cover until softened, about 20 minutes.

Generously brush the salmon fillets on both sides with olive oil and sprinkle lightly with salt and pepper. To make the glaze, in a small bowl, combine 1 tablespoon of the soy sauce, 2 tablespoons of the honey, and 1/2 teaspoon pepper and mix thoroughly. Set aside.

To make the dressing, in a small bowl, combine the remaining 4 tablespoons soy sauce and 1 tablespoon honey, the sesame oil, and the lemon juice mixing well.

Drain the noodles will in a colander, shaking the colander a few times to make sure all the water is removed. pat the noodles dry with paper towels. Toss the noodles with the dressing, cilantro, and sesame seeds. Set aside.

Oil the grill grate. Use tongs to arrange the salmon fillets, flesh side down, directly over the medium-hot fire. Grill the salmon until grill marks are etched across the fillets, about 3 minutes. Turn the fillets, skin side down, and brush the salmon flesh generously with the glaze. cover the grill and continue grilling the salmon until it is almost opaque throughout but still very moist when tested with a knife, or an instant-read thermometer inserted in the center registers 125 to 130 degrees, 3 to 4 minutes longer.

Divide the noodles among dinner plates. Using a wide spatula, place a salmon fillet in the center of each plate, on top of the noodles. Serve immediately.


Wednesday, May 21, 2008

Lunch from the Asian American Fesival


Chicago's Asian American Festival is being held at Daley Center this year. When my co-worker came back with Indian food for lunch today I was intrigued. I headed over there to see what I would discover. There were about 40 booths in total, half food and half stuff you could purchase (everything from purses to jewelry to bamboo). At the time I went there were belly dancers performing. There was at least one booth with every kind of Asian food you could think of: Indian, Thai, Chinese, Japanese, Korean, etc.

For my lunch I decided to try the Bibimbabh from one of the Korean booths. Bibimbabh is mixed vegetables and beef served over white rice with a side of spicy sauce so you can make it as spicy as you like. I got this at their recommendation and because the vegetables looked so fresh. While this would be enough for a normal person, I just didn't feel right leaving with only one type of cuisine. So I stopped by Amarit's "Thai and Panasian" booth and ordered a Spring roll and a Thai Iced Coffee.

This kind of lunch beats anything you can get in The Loop on a normal day! I may just have to go back tomorrow!


Saturday, April 21, 2007

Mongolian Beef


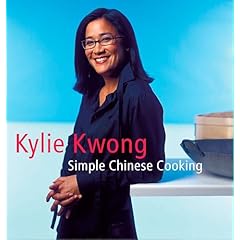
I've never had Mongolian Beef with ground beef before, but that is exactly what Kylie Kwong suggests in her recipe for it in her Simply Chinese Cooking cookbook. I would prefer to learn a recipe using flank steak or something similar to what I get when I order Chinese takeout, but I agree with Kylie, the ground beef gives this dish a light texture and it hold the flavor really well. I don't think it tasted the same as it does when I order takeout, but I liked it anyways.

This is a dish I think everyone will love. It's kind of like tacos. Just good flavor with ground beef. In fact, I used the leftovers for some breakfast tacos. So I crossed cuisines from asian stir-fry over to tex-mex. It seems like you can put anything in breakfast tacos, so I thought "why not"? I scrambled a few eggs and then mixed in the leftovers while reheating and then wrapped them up in a flour tortilla. It was really good. Look for a roundup of this month's Leftover Tuesdays at ceres & bacchus next week.

Mongolian Beef
(serves 4)

1 lb. 4 oz. quality ground beef
5 cups finely shredded Chinese cabbage
2 teaspoons sea salt
1/4 cup vegetable oil
2 tablespoons shao hsing wine or dry sherry
2 tablespoons hoisin sauce
1 tablespoon oyster sauce
1 teaspoon malt vinegar
1/2 teaspoon sesame oil
1 small carrot, peeled and finely sliced
1/2 medium-sized red pepper, finely sliced
3/4 cup finely sliced scallions

Marinade:
2 tablespoons shao hsing wine or dry sherry
1 tablespoon light soy sauce
1 tablespoon cornstarch
1 tablespoon finely diced ginger
3 garlic cloves, finely diced
1/2 teaspoon sesame oil

Combine ground beef with marinade ingredients in a large bowl, cover, and leave to marinate in the refrigerator for 30 minutes.

Meanwhile, place cabbage and salt in a large bowl, mixing together well with your hands to combine. Stand for 15 minutes then rinse under cold water and drain. Use your hands to squeeze out any excess liquid.

Heat 2 tablespoons of the oil in a hot wok until surface seems to shimmer slightly. Add half the marinated beef and stir-fry for 30 seconds, breaking up any lumps with a wok spoon. Remove from the wok with a slotted spoon and set aside.

Add remaining oil to hot wok, stir in remaining beef and cook, stirring for 30 seconds. Return reserved beef mixture to the wok with wine or sherry, hoisin sauce, oyster sauce, vinegar and sesame oil and stir-fry for 30 seconds.

Toss in reserved cabbage, carrot and pepper and stir-fry for a further minute. Stir through scallions, reserving just a little to garnish, and remove from heat.

Spoon beef into a serving bowl, sprinkle with remaining scallions and serve.


Wednesday, April 18, 2007

Ming's Mom's 3-2-1 Shrimp


I've been really into Simply Ming lately. I started recording it everyday and then having a Simply Ming marathon on weekends. I love the format of the show. He prepares on "master recipe", which is usually some type of sauce, and then he prepares three recipes using that sauce. In addition, he asks one guest chef to prepare one of their own meals using that sauce. Everyone from Rick Bayless to Sara Moulton to the Two Hot Tamales have appeared on his show.

I decided to make Ming's 3-2-1 Saute Sauce and his Mom's 3-2-1 Shrimp. On the same episode he also used the sauce to make Seared Monkfish with Sweet Onions and Peppers and Crispy Chicken Livers and Scallions. Emeril Lagasse was the guest chef and he made Sauteed Shrimp and Udon Noodles.

The sauce is so yummy! It took a while to prepare because you have to reduce it. But it is super easy to prepare and would be good with any stir-fry. I hope I have to time to try out one of the other recipes or do something else with the leftover sauce.


Thursday, March 22, 2007

Stir-Fried Noodles with Chicken Slivers


I had a little bit of a hard time with this recipe for Stir-Fried Noodles with Chicken Slivers from the Revolutionary Chinese Cooking cookbook. It was because of the noodles. I found Ho Fun Rice Noodles at the Asian market. They are dried and in one of the many noodle packages you have to look through. This package is mint green colored. The recipe instructions mention "soaking" the noodles but I chose to follow the instructions on the noodle package to cook them first. I think this is what you need to because I don't think you can stir fry them without them being cooked. Does anyone one know the traditional way to stir-fry noodles?

My noodles stuck to my wok. It was hard to stir-fry them. I was able to save most of them but then I had to completely clean out my entire wok before re-heating and cooking the rest of the dinner.

The end result is really tasty though. I like the "chicken slivers" but cutting up the chicken in really long and thin strips. I brought the leftover for lunch and my friend enjoyed it too. I was a little concerned it would be too oily, but it reheated just fine.

If you can find Ho Fun noodles, definitely give this one a try!

Stir-Fried Noodles with Chicken Slivers
ji si chao fen

2 boneless chicken breast halves (12 oz. total)
4 dried shitake mushrooms, soaked for 30 minutes in hot water from the kettle
1 1/2 lb. soaked Ho Fun Rice Noodles (about 5 oz. dry)
3 scallions, green parts only
2 tsp. finely chopped fresh ginger
2 tsp. finely chopped garlic
2 tsp. chopped salted chiles (can substitute Sambal Oelek)
2 tsp. soy sauce
Salt and White Pepper
5 oz. bean sprouts
2 tsp. soy sauce
Salt and white pepper
5 oz. fresh bean sprouts
1 tsp. sesame oil
5 Tbsp. peanut oil for cooking

for the marinade:
1/2 tsp. salt
2 tsp. light soy sauce
1 1/2 tsp. potato flour (can sub cornstarch)
1 tsp. Shaoxing wine
1 Tbsp. Water

Cut the chicken breasts along the grain of the meat into fine slivers. Place a bowl with the marinade ingredients and mix well; set aside.

Drain the mushrooms, squeeze dry, and remove the stems, then cut into fine slices. Cut the scallion greens into thin slivers about 1 1/2 inches long; set aside.

Heat the wok over a high flame until smoke rises, then add 3 tablespoons of the oil and swirl around. Add the drained noodles and stir-fry until hot and fragrant; set aside. (If you have deep-frying oil at hand, you can deep-fry instead, which is faster.)

Rinse the wok if necessary, then reheat with 2 tablespoons fresh oil. Add the chicken slivers and stir-fry until they separate. Add the ginger, garlic, salted chiles, and mushrooms and stir-fry until fragrant. Add the hot noodles and continue to stir-fry, adding the soy sauce and salt and pepper to taste.

Stir in the bean sprouts and stir-fry until they are piping hot. Finally, add the scallion greens, stir-fry a few times, then remove from the heat, and stir in the sesame oil. Serve immediately.

Variations: The same dish can be made with egg noodles, and you can use pork slivers instead of chicken if you prefer, or a mixture of mushrooms if you are vegetarian.


Monday, March 19, 2007

Junshan Chicken with Silver-Needle Tea


Ah, back in my kitchen after vacation. I couldn't wait to get back to my Revolutionary Chinese Cooking cookbook. Tonight I made Junshan Chicken with Silver-Needle Tea. It looks bland because it is so white, but it is delicately tasteful. There is a slight tea flavored sauce which seems to enhance the tender chicken. I didn't want to eat this with rice because I didn't want the rice to over power the natural flavoring.

I have never prepared a food recipe with tea before, but it has been on my list of things to do. I visited Teavana this past week and purchased several types of loose teas, including silver needle (which is known to have a high amount of antioxidants).

Many of the recipes in this cookbook call for chicken with the skin on. I can not find it anywhere, be it the thigh or the breast meat. It's boneless and skinless or boned and with skin. So I either have to make the recipe without the skin or mess around cutting it up. Tonight I went with the boneless chicken so there is no skin. And it still tasted great.

This was a fun recipe for me to prepare. I liked that I got to "wash" the tea as I have seen in tea ceremonies. And it was also fun to "double" fry the chicken by cooking it twice. It probably isn't that good for the waist-line though because of all that peanut oil.

Junshan Chicken with Silver-Needle Tea
jun shan ji pian

2 boneless chicken breast halves with skin
1 Tbsp. Chinese Yellow or Green Tea Leaves
Salt
1/2 tsp. sesame oil
1 1/4 cup peanut oil for cooking

for the marinade:
1/4 tsp. salt
2 tsp. Shaoxing wine
1 Tbsp. potato flour
1 large egg white

Holding your knife at an angle to the board, cut the chicken into thin slices. Put the slices in a bowl, add the marinade ingredients, and mix well. If there is any excess egg white that does not cling to the chicken, discard it.

Bring a kettle of water to a boil, and then let the water cool to 176 degrees before pouring 1/2 cups over the tea leaves. Strain off the water immediately, then add 5 tablespoons fresh water at the same temperature to the leaves, and leave to infuse.

Heat the oil over a medium flame until it reaches 275 degrees. Add the chicken nd swiftly separate the slices with a pair of chopsticks. When the chicken slices are pale but not completely cooked, remove them with a slotted spoon and set aside.

Drain off all but 3 tablespoons oil and return the wok to a high flame. Add the chicken and salt to taste and stir-fry. When the chicken and salt to taste and stir-fry. When the chicken is just cooked, pour in the tea infusion, leaves and all, and when the liquid boils, add the potato-flour misture and stir as it thickens the juices. Immediately remove from the heat, stir in the sesame oil, and serve.


Tuesday, March 6, 2007

#49: Fragrant-and-Hot Tiger Prawns


Another great meal I owe to my project to taste all the foods on Food & Wine's 100 Tastes to Try in 2007 list. #49 Hot Hunan Shrimp references the Revolutionary Chinese Cooking cookbook.

British cookbook author Fuchsia Dunlop was the first foreigner—and one of only four women in her class—to study full-time at China’s leading culinary school, the Sichuan Institute of Higher Cuisine. In February, she’ll publish her second book, Revolutionary Chinese Cookbook, about Hunan culture and cuisine. This stir-fried shrimp, like most of her recipes, is remarkably doable—and bracingly spicy.


The only problem I have with this book being on the list as it specifies Hot Hunan Shrimp as #49 and there are only 3 shrimp recipes in the entire book: Fisherman's Shrimp with Chinese Chives, Fragrant-and-Hot Tiger Prawns, and Noodles with Fresh Shrimp and Baby Greens. I decided to try the Fragrant-and-Hot Tiger Prawns because it seems to be the "hottest" of the three. And it was delicious!

One thing to note is that the cooking is SUPER-FAST. I had to read the recipe a few times so I could remember everything I was supposed to do before I started. I still had to glance back at the book now and then, but the recipe is pretty simple and it kind of cooked itself.

I really want to dive into this book alot more. But I have some family coming into town and we are going to be out and about for an entire week. I probably won't even cook at all. So I'm using this as my bed-time reading. It's really interesting to learn all about the Hunan way of cooking.

Fragrant-and-Hot Tiger Prawns
xiang la xia

1 lb. tiger prawns or jumbo shrimp, thawed if frozen
1/2 tsp. salt
1 Tbsp. Shaoxing wine
1 tsp. finely chopped fresh ginger
1 tsp. finely chopped garlic
1 tsp. chili bean paste
1 tsp. chopped salted chiles
3 Tbsp. water
1/4 tsp. dark soy sauce
2 scallions, green parts only, finely sliced
1 Tbsp. finely chopped red bell pepper
1 tsp. sesame oil
1 cup peanut oil for cooking


Cut the heads off the prawns or shrimp, and remove the legs. Remove as much of their dark veins as possible.

Heat the oil in a wok over a high flame until it reaches 350 degrees. Shake the prawns dry. Tip them into the wok and deep-fry for less than 30 seconds, until they have turned pink and are partially cooked. Remove with a slotted spoon and set aside.

Pour off all but 3 tablespoons of the oil, and return the wok to a medium flame. Add the ginger, garlic, chili bean paste, and chopped salted chiles and stir-fry until the oil is wonderfully fragrant and stained a deep red by the chiles. Add the water and dark soy sauce and bring to a boil.

Add the prawns and then cook over a high flame to reduce the sauce, stirring constantly. When the water in the sauce has evaporated, add the scallions and bell pepper to give them a lick of heat. You should smell the fragrance of the onions after a few seconds, at which point remove the wok from the heat, stir in the sesame oil and serve.


Saturday, March 3, 2007

Soy-Marinated Roast Chicken Legs


Chicken legs are my favorite part of the chicken. I was excited when I found this recipe for Soy-Marinated Roast Chicken Legs in the Japanese Light cookbook. I made a double batch and used the extra chicken for leftover tacos and in a salad.

It may be a simple concept, but the process patting the chicken dry after marinating and then brushing with oil makes them extra crispy. It was perfect and I learned something new!

Soy-Marinated Roast Chicken Legs

4 chicken legs
1 tablespoon vegetable oil
1 teaspoon Asian sesame oil

for the marinade:
1/3 cup soy sauce
3 tablespoons sake
3 tablespoons mirin
4 garlic cloves, peeled and crushed
2 tablespoons sugar

Make 3-4 incisions on each chicken leg across the muscle tendon to help the marinade penetrate. Put the chicken in a bowl, mix together all the marinade ingredients, and pour over the chicken. Marinate overnight in the refrigerator.

Preheat the oven to 375 degrees. Take the chicken legs out of the marinade and pat dry with paper towels. Mix the vegetable and sesame oils, brush the legs with them and roast for 25-30 minutes. Turn off the oven and leave the chicken inside until you are ready to serve. This way the chicken legs will be juicy and succulent.


Tuesday, February 27, 2007

Shimeji Mushrooms and Ginkgo Nut Parcel


I chose to make this Shimeji Mushrooms and Ginkgo Nut Parcel from the Japanese Light cookbook just because it looked like fun. I love mushrooms and the recipe includes photographs of wrapping up the little tin foil parcels. I haven't made anything like that in a while. The only problem was, I had no idea what shimeji mushrooms were. Long story short, they are also known as beech mushrooms. I found them in a package in the refrigerator section of the Asian market.

I wasn't all that impressed with these. It is a simple recipe with pure and simple flavors. Everything tasted fresh and healthy. I just wanted . . . something. Maybe more garlic or some soy sauce. After I ate half of my parcel I mixed them in with the Steamed Eggplant with Spicy Miso Dressing so that they could have some of the dressing on them. Maybe they would have been better if I ate them with a stronger flavored main dish.

Shimeji Mushrooms and Ginkgo Nut Parcel

2 packets shimeji mushrooms
1/4 cup extra virgin olive oil
2 garlic cloves, peeled and crushed with the side of a knife
12 ginkgo nuts* (sold ready to use in vacuum packs or cans in Asian markets)
1/2 teaspoon salt
4 thick slices lime

4 (12-inch) squares of aluminum foil

*if using the canned variety, rinse off the brine

Preheat the oven to 350 degrees. Cut the base off of the mushrooms and separate them (or if desired, keep them in little clumps). Heat a skillet over a moderate heat and add the garlic to the olive oil to flavor. Remove the garlic when it turns golden. Increase the heat and quickly saute the mushrooms and ginkgo nuts; season with the salt.

Divide the mushrooms into four equal portions and transfer each portion into the center of an aluminum foil sheet. Add a lime slice to each one and gather up the corners to make parcels. Make the parcels as roomy as possible so as not to crowd the ingredients. Put them on a baking sheet and bake them for 5 minutes. Serve unopened and let your guests enjoy the fragrance as they open them at the table.


Sunday, February 25, 2007

Seared Tuna Steak with Daikon Dressing


I almost cried when I had my first bite of this Seared Tuna Steak with Daikon Dressing from the Japanese Light cookbook by Kimiko Barber. I used sushi-grade tuna and I think that was key because I love my tuna rare. The marinade is so simple and really compliments the natural flavors of the tuna. I'm definitely going to have to make this for my mother the next time she comes down to Florida to visit me because I know she will love it too.

I made a few changes to the recipe in the book: I used sesame oil instead of vegetable oil and I omitted the arugula because I could not find any at the grocery store. The daikon called for in the recipe I found at an Asian grocer and I didn't even look at my local store so I am not sure if it is widely available or not.

Seared Tuna Steak with Daikon Dressing

4 tuna steaks, each weighing about 4 ounces and cut 1 1/4-inches thick
1 tablespoon vegetable oil
handful of arugula leaves
8 chives, finely chopped

for the marinade
1/3 cup soy sauce
3 tablespoons sake
2 tablespoons rice vinegar
1 garlic clove, minced

for the daikon dressing
1/4 cup grated daikon (Japanese white radish)
1/4 cup soy sauce
4 teaspoons lemon juice

Instructions:
In a large bowl, mix all of the ingredients together for the marinade. Add the tuna steaks and let sit for at least thirty minutes. Turn tuna steaks once or twice.

While the tuna is marinading, mix all of the ingredients together for the daikon dressing in a small bowl.

Remove the tuna from the marinade the pat dry with paper towels. Brush one side of the tuna with half of the oil.

Heat a griddle pan or heavy skillet over medium-high heat. Make sure pan gets very hot before adding the tuna. Cook tuna for two minutes and brush the raw side of the tuna with the other half of the oil while cooking. After two minutes turn over and cook for another two minutes. (Tuna will be rare. If you like it more well done you can cook the second side up to five minutes.)

Transfer steaks to a cutting board and slice. Arrange slices on serving plates. Spoon dressing over tuna slices and top of a few arugula leaves. Garnish with chopped chives.


Saturday, February 24, 2007

Thai Pink Grapefruit Salad


This salad has one of the most unique flavor combinations I have ever tasted. And I probably would not have even tried it if I wasn't looking for salads for Weekend Cookbook Challenge #14: Salads. I am not a big salad person but I like grapefruit, coconut and mint so I thought I'd try the Pink Grapefruit Salad with Toasted Coconut and Fresh Mint from Quick & Easy Thai by Nancie McDermott.

This salad is naturally tart and acidic since grapefruit is the main ingredient. But it is also salty from the soy sauce and dried shrimp, hot from the Thai chili peppers, sweet from the coconut and sugar, and fresh tasting from all of the mint. It is so amazing. I was so impressed with myself that I made this. It seems like it should be too complicated to make something with such complex flavors. But it was simple! The hardest part was peeling the grapefruit.

Look for the round up of this month's Weekend Cookbook Challenge hosted this month by Tami from Running with Tweezers.

Pink Grapefruit Salad with Toasted Coconut and Fresh Mint
yum some-oh

Ingredients:
3 tablespoons shredded coconut

2 tablespoons freshly squeezed lime juice

2 tablespoons fish sauce

1 tablespoon sugar

2 cups bite-sized chunks peeled, sectioned pomelo or grapefruit

2 tablespoons dried shrimp, coarsely chopped, or 2 tablespoons coarsely chopped roasted, salted peanuts (optional)

1 tablespoon coarsely chopped shallots

2 teaspoons finely chopped fresh hot green chilies or dried red chili flakes

1/2 cup coarsely chopped fresh mint or cilantro
leaves of boston lettuce or bibb lettuce for accompaniment

Instructions:
Toast the shredded coconut in a small, dry skillet over medium-high heat for 3 to 4 minutes, tossing often, until most of it turns a rich, soft brown. Turn out onto a saucer to cool.

In a medium bowl, combine the lime juice, fish sauce, and sugar and stir well to dissolve sugar and a form a smooth sauce. Add the pomelo, toasted coconut, dried shrimp (if using), shallots, chilies, and mint, and toss gently to combine everything well. Transfer to a serving platter with lettuce leaves on the side, and serve at room temperature.


Sunday, February 18, 2007

Numbing and Hot Chicken


I'm in love! In love with another cookbook. Thankfully my current favorite, On Top of Spaghetti, won't get too jealous. I can cook one dinner from each of them each week. The Revolutionary Chinese Cookbook: Recipes from Hunan Province by Fuchsia Dunlap is really sucking me in. I spent a few nights before bed this past week actually reading this cookbook. I read the forward, the intro and about the Hunanese pantry and have learned alot.

While flipping through the recipes, Numbing-and-Hot Chicken was one of the first that caught my eye. Maybe it was the photo or maybe it was because the word "numbing" is in the title. The numbing attribute is intriguing to me. It ends up that this dish calls for sichuan pepper which I happen to have since sichuan peppercorns are #72 on Food & Wine's Top Tastes to Try in 2007. In fact, I heard about this book from the F&W 100 list. Hot Hunan Shrimp is #49 and the blurb recommended this cookbook by Fuchsia Dunlap.

Tonight is Chinese New Year's so I decided try this out tonight and make an event out of it. I had so much fun going to the Asian grocery store to stock up on ingredients. After I got home, I took a deep breath and went at it. I cranked up the music and went to chopping up my chicken and veggies but it didn't take nearly as long as I thought. My wok has been very under-used so it was very happy tonight double-frying the chicken and then stir-frying it all together.

I only got confused at one part in this recipe. "3 scallions, white parts only" are called for. But the instructions say to "cut them into 1 1/4- to 1 1/2-inch pieces". Anyone who knows scallions know that is about as long as the white part is in total, let alone cutting in into pieces. And the picture had some green in it so I cut the greens into the 1 1/4-inch pieces and diced the whites into smaller pieces.

Numbing-and-Hot Chicken
ma la zi ji

Ingredients:
12 oz. bones chicken thigh or breast half, if you prefer, with skin
1 small red bell pepper, thin-skinned if possible
1 fresh red chili, or 1 tsp. dried chili flakes
3 scallions, white parts only
1 tsp. whole sichuan pepper
1 tsp. sesame oil
1 1/4 cups peanut oil for deep-frying

For the marinade:
1 Tbsp. Saoxing wine
1 Tbsp. light soy sauce
1/4 tsp. dark soy sauce
1 Tbsp. potato flour mixed with 1 Tbsp. cold water

For the sauce:
1 Tbsp. light soy sauce
1 Tbsp. clear rice vinegar
1/2 tsp. potato flour
3 Tbsp. chicken stock or water

Instructions:
Cut the chicken as evenly as possible into bite-size cubes. Place the chicken cubes in a bowl, add the marinate ingredients and mix well; set aside while you prepare the other ingredients.

Discard the stem and seeds of the pepper, and cut into small squares to complement the chicken. If using a fresh chili, slice it thinly, discarding the stem and seeds as far as possible. It the scallions are slender, cut them into 1 1/4- to 1 1/2-inch pieces, otherwise slice them on a steep angle. Crush the Sichuan pepper using a mortar and pestle. Combine the sauce ingredients in a small bowl; set aside.

Heat the oil for deep-frying in the wok over a high flame to 300-400 degrees F. Add the chicken and stir briskly for about 30 seconds, until the pieces have separated and have become pale; remove from the oil with a slotted spoon. Allow the oil to return to 350-400 degrees F, then fry the chicken again until golden; remove and set aside. Drain off all but 3 tablespoons of the oil.

Return the wok to the heat and, working quickly over a high flame, tip in the red bell pepper, fresh or dried chiles, scallions, and Sichuan pepper and stir-fry briefly until they are wonderfully fragrant.

Stir in the chicken. Give the sauce a stir and tip it in to the wok. Stir briskly as the sauce thickens. Finally, off the heat, stir in the sesame oil and serve.


Saturday, February 17, 2007

Spinach with Black Pepper and Garlic


I had a bag and a half of spinach leftover from a complicated recipe I never had time to make last week. This morning I was flipping through cookbooks and found this recipe in Quick & Easy Thai by Nanci McDermott. Spinach with Black Pepper and Garlic (pank spi-naht paht gratiem prik thai) is really easy to make so I threw it together for a quick lunch in between errands. I normally don't sit down to a big plate of spinach, but it actually was quite filling.

Spinach with Black Pepper and Garlic
pahk spi-naht paht gratiem prik thai

2 tablespoons vegetable oil
1 tablespoon coarsely chopped garlic
8 to 10 cup loosely packed fresh spinach leaves (about 20 ounces)
2 tablespoons fish sauce
2 teaspoons sugar
1/2 teaspoon black pepper
1/4 cup water

Heat oil a wok or large skillet for about 1 minutes. Add garlic and toss well in the oil. Add the spinach and gently toss to coat in the oil. Add the fish sauce, sugar, pepper and water. Toss well and keep tossing until all the spinach is wilted and tender, 1 to 2 minutes. Turn onto a deep plate, sauce and all. Can be served hot, warm or at room temperature.